
Replacing the gearbox on a Woods 12-foot batwing mower is a critical maintenance task requiring mechanical aptitude, proper tools, and strict adherence to safety protocols. This procedure demands precision due to the gearbox’s integral role in transmitting power from the tractor’s PTO to the cutter decks via the driveline. Incorrect installation can lead to premature failure, vibration, or driveline separation. The following outlines the essential steps for a successful gearbox replacement.

(how to change gearbox on woods 12ft batwing mower)
Prioritize safety. Engage the tractor’s parking brake, lower the mower fully to the ground, and shut off the engine. Remove the ignition key. Disconnect the negative battery terminal on the tractor. Ensure all rotating components are completely stopped. Wear appropriate personal protective equipment including safety glasses, gloves, and steel-toed boots. Work on a level, stable surface. Never work under an unsupported mower.
Gather necessary tools and parts: replacement gearbox (verified correct model for your specific Woods mower), appropriate wrenches and sockets (metric and SAE), torque wrench, pry bars, alignment pins or tapered bolts, hydraulic jack and jack stands, gear oil meeting manufacturer specifications, thread-locking compound, and a clean workspace. Consult the Woods operator and parts manuals for specific torque values and diagrams.
Begin by disconnecting the driveline shafts from both the input and output flanges of the gearbox. Mark the orientation of any universal joint yokes relative to the flanges using paint or punch marks to facilitate reassembly. Remove any retaining clips, bolts, or pins securing the shafts. Carefully slide the shafts away from the gearbox, supporting them to prevent strain on the joints. Next, locate and remove all mounting bolts securing the gearbox housing to the mower frame. Note any shims or spacers between the gearbox and the mounting surface; their precise location and quantity must be replicated during reinstallation. Carefully lower the gearbox using a hydraulic jack. Inspect the mounting surfaces on the frame for damage, corrosion, or wear. Clean these surfaces thoroughly.
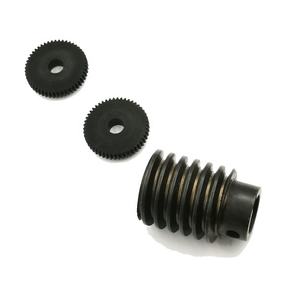
Unpack the new replacement gearbox. Verify the input and output shaft rotation direction matches the old unit. Check the oil level in the new gearbox per the manual; top up with the specified oil if necessary. Do not pre-fill gearboxes designed for vertical mounting until installed. Apply a suitable thread-locking compound to the threads of the new mounting bolts. Carefully position the new gearbox onto the mounting surface using the jack. Reinstall any shims or spacers exactly as noted during removal. Insert alignment pins or tapered bolts into opposing bolt holes to position the gearbox accurately before installing the remaining mounting bolts. Hand-tighten all bolts initially. Gradually tighten the bolts in a star pattern to the manufacturer’s specified torque value using a calibrated torque wrench. Uneven tightening can distort the housing.
Reconnect the driveline shafts. Align the previously made marks on the yokes and flanges precisely. Ensure the universal joints are phased correctly; the yokes on each end of a shaft section must be aligned in the same plane to prevent destructive vibration. Install all retaining hardware (bolts, pins, clips) and torque to specification. Double-check that all bolts are secure and that the shafts can rotate freely without binding or contacting any part of the mower frame throughout their range of motion. Verify the gearbox oil level is correct per the manual and fill if required.
Conduct a thorough pre-operation inspection. Visually confirm all hardware is installed and torqued. Ensure the driveline shielding is correctly reinstalled and undamaged. Clear the work area of tools and personnel. Reconnect the tractor battery. Start the tractor engine and engage the PTO at the lowest possible speed while standing clear of the mower. Observe the gearbox and driveline for any unusual noise, excessive vibration, or oil leaks. Immediately disengage the PTO and shut off the engine if any abnormality is detected. If initial operation is normal, gradually increase PTO speed to operating RPM, continuing to monitor closely. Perform a brief cutting test under light load, inspecting again afterward for leaks or loose hardware.
(how to change gearbox on woods 12ft batwing mower)
Proper gearbox replacement is paramount for the safe and efficient operation of the Woods batwing mower. Meticulous attention to alignment, torque specifications, driveline phasing, and lubrication ensures longevity and prevents catastrophic failure. Always refer to the official Woods maintenance documentation for model-specific details. Neglecting precise procedures risks significant equipment damage and operator hazard.